


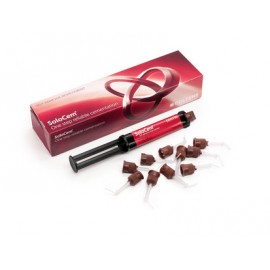
Coltene Solocem Transparent
Available Options
For fast ORDERING experience Visit our new site  www.medicabasket.com
NOTE: Due to volatility in dental market, Price and stock shown here are tentative and needed approval of supplier, Although we update frequently. Our Team will your order soon.
COD is not available now.
Call/ WhatsApp on +91-9313922999 / +91-9810283698

- Information
-
Dental Brands
- 3M Espe
- 3M Unitek
- A.J. Wilcock
- Agfa
- American Orthodontics
- Ammdent
- Anabond
- Angelus
- API Ashoosons
- API Instruments
- Apple Dental
- Being Foshan
- Bestodent
- Bien Air
- BIOLASE
- Blossom
- Bombay Dental
- Capri
- Captain Ortho
- Cerkamed
- Colgate
- Coltene Whaledent
- Confident
- D-Tech
- Danville
- Denext
- Dental Books
- Dental-Avenue
- Dentaurum
- Dentium
- Dentsply
- Desires ortho
- Detax Dental
- Diadent
- Dispodent
- DMG
- DPI
- Durr Dental
- Eighteeth
- Eltee Instruments
- Endoking
- Euronda S.P.A
- Fgm
- Fuji film
- G&H
- GC
- Gen-XT Implant
- Gendex
- Genoray
- Green Guava
- Hahnenkratt
- Heraeus Kulzer
- Horico
- Hu-Friedy
- ICPA
- Ids Denmed
- IMDSL Laser
- Itena
- Ivoclar Vivadent
- J Morita
- Jota
- Kalabhai
- Kavo
- Kerr
- Kodak
- Labomed
- Leone
- Libral
- Life Steriware
- Maarc
- Mani
- Marathon
- MDC
- Medicept
- Meta
- Modern ortho
- Moriz
- Navadha
- Neelkanth
- NeoEndo
- Novabone
- NSK
- Oracura
- Orateek
- Orchestrate O3D Aligner
- Ormco
- Oro
- Ortho Classic
- Ortho Organizers
- Ortho Technology
- Orthocare
- Orthosource
- Premier
- Prevest
- Prima Dental
- Pulpdent
- Pyrax Dental
- Rabbit Force Ortho
- Rejove 32Watts Aligners
- RS Dental Chair
- Ruby Dental
- Ruthinium
- Saeshin
- Samit
- Scheu
- SDI
- Septodont
- Shivam Dental
- Shofu
- SK Surgicals
- Skydent
- SS-White
- Strong
- Sun Medical
- Sure Endo
- Surgiwear
- Tokuyama
- TP Orthodontics
- Unicorn
- Unident
- Unique
- Vatech
- VDW
- VeeCare
- Vita
- Voco
- VRN
- W&H
- Waldent Equipment
- Waldent Instruments
- Waldent Material
- Woodpecker
- Zhermack
- Zoom
- Triodent
- Other brands
- Offers & Combos
- Contact Us
-
Product Category
- Composites & Restoratives
- Dental Education
-
Dental Equipment
- Air-Motor
- Apex Locators
- Autoclaves & Sterilizers
- Dental Air Compressor
- Dental Chair
- Dental Chair Accessories
- Dental Handpiece
- Dental Laser
- Dental Loupes
- Dental Surgery
- Endo Motor
- Handpiece Cartridge
- Implant Motors
- Intraoral Camera
- LED Light Cure
- Micromotors
- Microscope
- Radiology
- Suction Units
- Ultrasonic Scalers
- UV Chamber
- Dental Lab
- Endodontics
- Implantology
- Instruments And Burs
- New Clinic Setup Kits
- Oral Surgery
- Paedodontics
- Periodontics
- Prosthodontics
- Sterilization & COVID-19 Supplies
- General Dentistry
-
Ortho Store
- Arch Wires & Springs
- Bonding Adhesives
- Elastomerics
- Expansion Screws
- Headgear accessories
- Laboratory Products
- Mini TAD Screw
- Molar Bands and Tubes
- Ortho Attachments
- Photographic Accessories
- Weldable Accessories
- Braces or Brackets
- Clear Aligners
- Orthodontic Appliances
- Orthodontic IPR solutions
- Orthodontic Instruments
- Find Your Dentist
- Medica Basket
Your shopping cart is empty!
- Easy to use and time saving
- High bonding strengths without additional adhesive
- Low shrinkage
- Antibacterial zinc oxide
- High radiopacity
Easy and fast application
SoloCem saves you time without having to forego reliable bonding. MDP and 4-MET(A) monomers ensure good bonding values on a range of different materials without requiring a separate adhesive. This simplified form of application reduces the risk of potential error sources which could affect the bond and thus the quality of the entire restoration.
- Self-adhesive properties
- Fluorescent
- Automix syringe and ready-to-use mixing tips
- Intraoral processing time of approx. 60 seconds
- Easy removal of excess material (after light curing for 3 seconds)
Description
Secure cementing does not depend on the number of working steps. Self-adhesive SoloCem achieves reliable values – with no additional bonding. This is the result of monomers contained and the composite-like formulation. The convenient automix syringe and the ready-to-use mixing tips offer a simple and time-saving application of SoloCem.
Indications
The easy handling of SoloCem offers advantages in a number of indications. You can count on the self-adhesive properties of SoloCem for the permanent cementation of:
- Crowns (ceramic, metal, composite)
- Bridges (ceramic, metal, composite)
- Inlays (ceramic, metal, composite)
- Onlays (ceramic, metal, composite)
- All types of endodontic posts
- Implant abutments (zirconium oxide and titanium)
Key Specifications
Composition
- Methacrylates
- Zinc oxide
- Dental glass
TECHNICAL SPECIFICATIONS:
| Flexural strength | 115 Mpa |
| Compressive strength | 190 Mpa |
| Radiopacity | 4 mm Al / mm |
Packaging
Coltene Solocem Transparent - Refill 2.5ml/5g Syringe:
- 1 x 2.5ml syringe / 5g
Coltene Solocem Transparent - Trial Kit 5ml / 10.5g Syringe:
- 1 x 5ml Syringe / 10.5g
Direction to Use
Working Time
Working time is dependent on temperature. The time will decrease with higher temperatures or increase with lower temperatures. SoloCem is light-sensitive and should not be exposed to intense light, particularly surgical lighting, for long periods of time.
Interactions
Phenolic and other substances (e.g., zinc oxide eugenol) that inhibit polymerisation must not come into contact with SoloCem.
Application
Tooth isolation: A dry working area is the basis for good results. The use of a dental dam is recommended
1. Post cementation
Note: Preparation of the working field will result in an optimal and efficient procedure
1.1 Select a suitable root post system (e.g., ParaPost® Fiber Lux™, ParaPost® Taper Lux™)
1.2 Prepare the root canal according to the manufacturer’s instructions for use
1.3 Apply SoloCem
Remove the safety cap or mixing tip. Squeeze some of the material onto a paper towel until the base and catalyst flow evenly from the opening. This will ensure a uniform mixture
1.3.2 Wipe the opening with a paper towel. Replace the mixing tip and give it a ¼-turn (90°) clockwise. Squeeze out the material and discard it until a uniform, homogeneous paste flows out. Caution: Do not dry out the dentin
1.3.3 Apply SoloCem directly into the prepared root canal using the syringe with the brown, short, super fine
If desired, the cement can also be applied in the canal using a lentulo spiral
1.3.4 Apply the cement on the root post or directly into the root canal and position the post in the root canal, applying slight pressure. Remove excess material. Use disinfectant to clean off the mixing tip (do not remove it)
1.3.5 The SoloCem material can be light-cured for 30 s to accelerate polymerisation or to reduce the inhibition layer
2. Cementing crowns, bridges, inlays, onlays
2.1 Pre-treat the inner restoration site/contact surfaces
2.1.1 Always pre-treat the restoration contact surfaces according to the manufacturer’s instructions
2.2 Apply SoloCem restoration cement
2.2.1 Remove the safety cap or mixing tip. Squeeze some of the material onto a paper towel until the base and catalyst flow evenly from the opening. This will ensure a uniform mixture
2.2.2 Wipe the opening with a paper towel. Replace the mixing tip and give it a ¼-turn (90°) clockwise. Squeeze out the material and discard it until a uniform, homogeneous paste flows out. Caution: Do not dry out the dentin
2.2.3 Apply SoloCem directly onto the inner surfaces of the restoration and/or preparation (for concave forms in order to prevent air pockets), where required. 2.2.4 Next, position the restoration, applying slight pressure. After use, disinfect the mixing tip with disinfectant, but do not remove it
2.2.5 Remove excess (e.g., with a brush or spatula) and hold the restoration in position by applying increased pressure. Note: Remove the remaining excess with a fine spatula or another suitable instrument while the restoration is held in position. The use of matrices, wedges, dental dam, etc. is intended to guarantee that no cement can flow into the sulcus and approximal area, as this can only be removed with difficulty after curing. The excess can no longer be removed once SoloCem attains a gelatinous consistency
2.2.6 The material can be light-cured for 20 s per side/ surface (where layer thickness is 2 mm) to accelerate polymerisation or to reduce the inhibition layer. Excess can be removed after brief (3 s) polymerisation or until the chemical curing allows a removal. Use disinfectant to clean off the mixing tip but do not remove it
3. Cementing on implant abutments
3.1 Pre-treat the inner restoration site/contact surfaces
3.1.1 Always condition the contact surfaces of the restoration according to the manufacturer’s instructions
3.2 Apply SoloCem cement on implant abutments
3.2.1 Remove the safety cap or mixing tip. Squeeze some of the material onto a paper towel until the base and catalyst flow evenly from the opening. This will ensure a uniform mixture
3.2.2 Wipe the opening with a paper towel. Replace the mixing tip and give it a ¼-turn (90°) clockwise. Squeeze out the material and discard it until a uniform, homogeneous paste flows out
3.2.3 Apply SoloCem directly to the inner surfaces of the restoration (for concave forms in order to prevent air pockets) and/or on the implant abutments or stumps, where required
3.2.4 Position the restoration by applying slight pressure
3.2.5 Remove excess (e.g., with a brush or spatula ) and hold the restoration in position by applying increased pressure.
Note: Remove the remaining excess with a fine spatula or another suitable instrument while the restoration is held in position. The use of matrices, wedges, dental dam, etc. is intended to guarantee that no SoloCem can flow into the sulcus and approximal area, as this can only be removed with difficulty after curing. The excess can no longer be removed once SoloCem attains a gelatinous consistency. Excess can be removed after brief (3 s) polymerisation or until the chemical curing allows a removal. Use disinfectant to clean off the mixing tip but do not remove it
3.2.6 The material can be light-cured for approximately 20 s per side/surface (where layer thickness is 2 mm) to accelerate polymerisation or to reduce the inhibition layer.